

We hope you enjoyed your weekend and are ready to jump-start into the new week!
We sat together with some of you, brainstorming and discussing possible solutions to a Freelancer Pool in Personio. Finally, we crafted a best practice for Freelancer Management and are delighted to share our concept with all of you! As employees represent the lifeblood of any company their management is of great importance. By following these six steps you can facilitate your processes and effectively manage your freelancer workforce in Personio.
A step by step guide
Step 1: Create a freelancer pool
Your freelancer pool will be managed within the Recruiting module. Create a new category “Freelancer Pool” (Settings > Recruiting > Categories) as well as a new position “Freelancer Pool” (Recruiting > Positions > Create position) in order to store all freelancer profiles in one place.
Step 2: Structure your freelancer pool
Additional phases (Settings > Recruiting > Phases) will help you to structure your freelancer pool according to projects, location or subject area. Keep track of core skills as well as your freelancers´availability status by using tags (Settings > Recruiting > Tags).
Step 3: Manage your freelancer pool
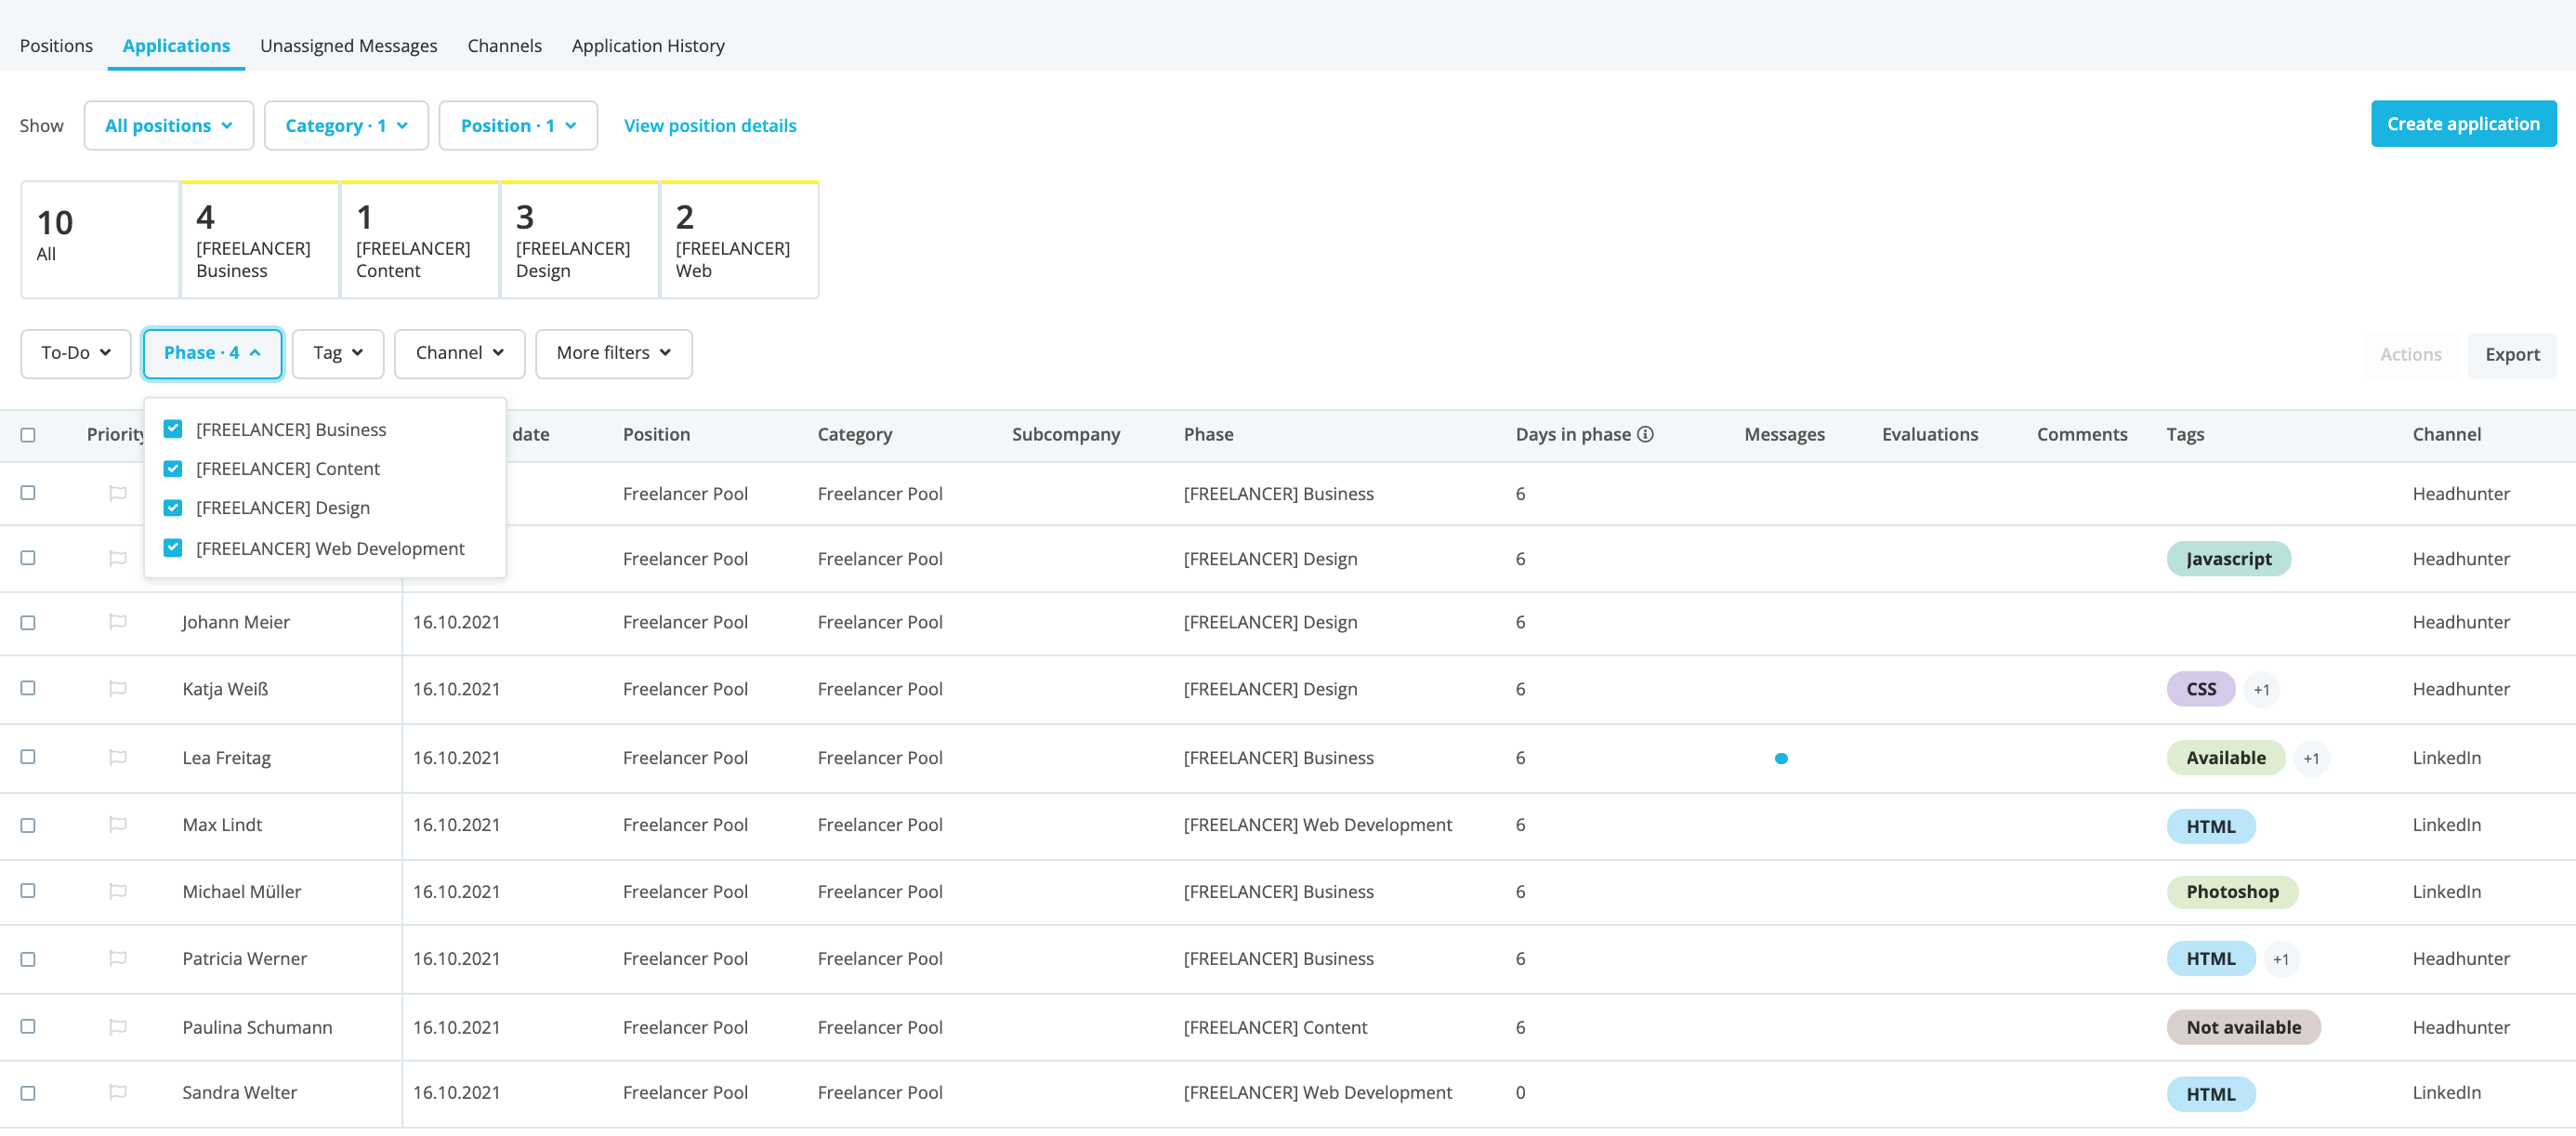
Find the right candidate: The application list is filterable by position, phase and tag, which makes it easy to search for keywords such as specific skills, availability, location or subject area within your freelancer pool.
You can also proactively involve project leads in the selection process by creating a new recruiting role (Settings > Recruiting > Roles) and granting access to the “Freelancer Pool” position and thus all freelancer profiles.
Communicate with freelancers: Use the messaging tab to send project proposals, check their availability or align on contractual conditions. Create predefined email templates (Settings > Recruiting > Email templates) to make the communication and alignment process more efficient.
Evaluate freelancer performance: Create evaluation forms (Settings > Recruiting > Evaluations) and request feedback from project leads on a regular basis in order to evaluate their performance on the current project and facilitate the selection process for future projects.
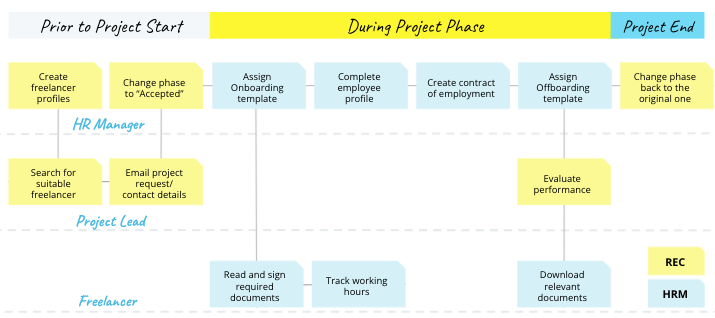
Step 4: Start the onboarding process
Once a freelancer has been selected and agreed on the project terms and conditions, the respective freelancer profile needs to be moved to the “Accepted” phase in order to automatically create a new employee profile and trigger the Onboarding process.
Assign a dedicated “Freelancer” Onboarding template, which might include the following tasks:
-
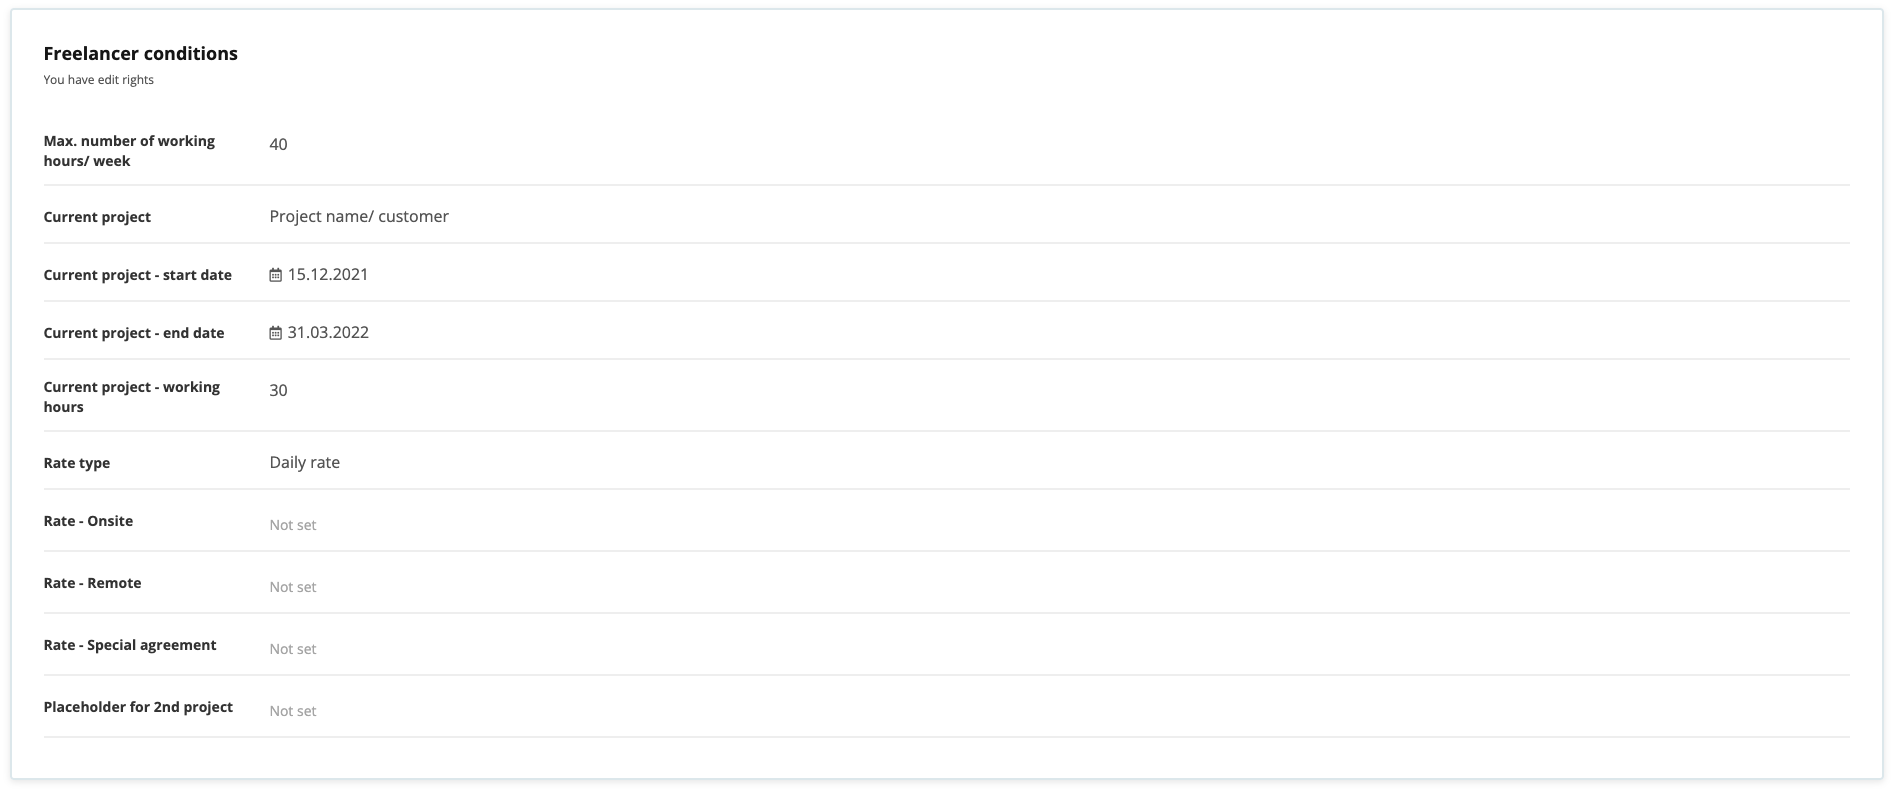
Complete employee profile: Personal & payroll data, contract details, freelancer conditions such as job/ project description, rate details and working hours (Responsible: HR Manager)
-
Prepare and send contract (Responsible: HR Manager)
-
Assign working hour schedule and freelancer employee role (Responsible: HR Manager)
-
Send time tracking information (Responsible: HR Manager)
-
Read and sign documents such as the data protection instruction (Responsible: Freelancer)
Step 5: Administrate freelancer profiles
Track and analyse data: Create a dedicated section for freelancer-related data and grant access for everyone involved in the Freelancer management process.
We suggest creating and saving a new view in the employee list with all relevant freelancer data to keep track of their current project status and conditions. We also recommend setting the Employment type to External and the Occupation type to Freelancer. This will allow you to create freelancer-specific reports and exclude freelancers from internal ones.
In addition, you can set reminders and track project- or contract-related comments via the Notes tab.
Time tracking: Enable time tracking for freelancers with an hourly rate. In case freelancers are working on several projects simultaneously you can analyse their working hours per project by making use of the project-based time tracking possibility (Settings > Attendance > Projects).
Step 6: Start the offboarding process
Once the project ends, enter a termination data which allows you to assign an offboarding template. The employee status will change to Inactive which prevents freelancers from logging in to Peronio. In addition, move the freelancer profile back to your freelancer pool by changing the phase from “Accepted” to the original one.
We are very curious to hear about your feedback and would like to exchange ideas with you in the comment section below!